


Beacon Setup now launched during initial App setup.
3/12/24
By accessing or using Silent Beacon, LLC’s (“SBL”) mobile applications (“the Apps”), or other additional services and features to which you may subscribe for additional fees (the “Services”) owned or operated by SBL (also referred to as “We”, “Us”, or “the Company”) or Device, you are accepting and agreeing to be bound by the terms and conditions set forth within our Terms of Service, which may be modified by us in our sole discretion from time to time (the “Terms”)and you shall be bound by any modified Terms. Because our Apps, Services and Devices continue to evolve, we may change or discontinue all or any part of the Apps, Services and Devices, at any time and without notice, in our sole discretion.
The Silent Beacon device is referred to as the Beacon
The Silent Beacon’s application is referred to as the App
The main Silent Beacon user is referred to as You or Your.
A person you choose to receive alerts inside the app is called a Contact
A second user of a separate App and Beacon is referred to as a Secondary User
Your mobile phone, Tablet, or other Bluetooth device the beacon is connected to is referred to as a Smartphone
The lighting system on the Device is referred to as a LED
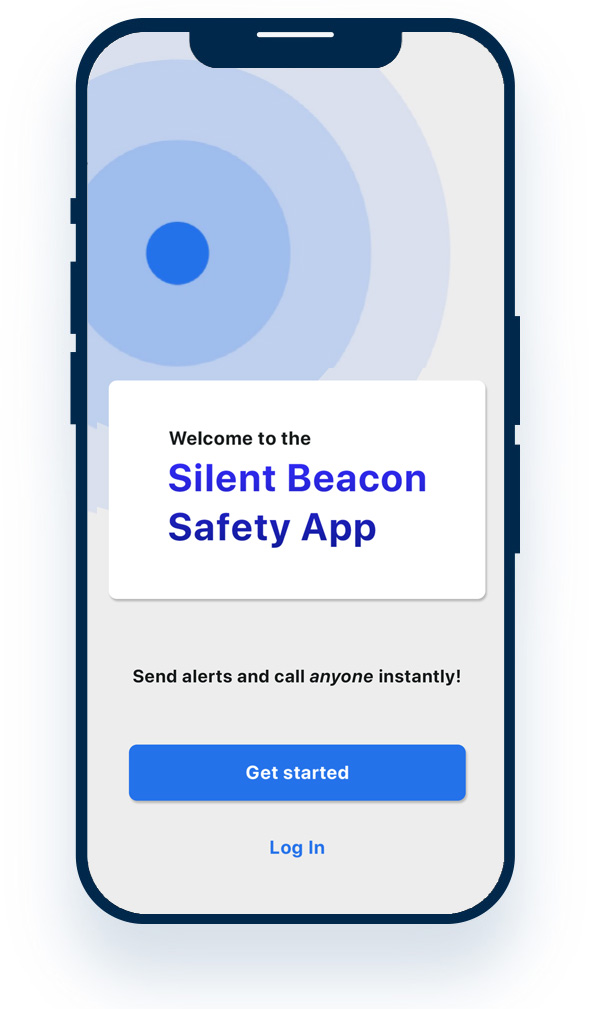
The Silent Beacon Application is exclusively downloadable for iPhones and iPads through Apple’s iOS App Store as well as for Bluetooth-enabled Android phones and tablets at the Google Play Store.
Search & Download “Safety App for Silent Beacon“
Compatibility for Apple Devices
Any Bluetooth 5.0 enabled iPhone or iPad with cellular service and the latest operation system installed is compatible.
Compatibility for Android Devices
To check if the your device is compatible, simply search for the App on Google Play store. If the App appears, it will work on your device.
Make sure your app is updated to the latest version and that the Firmware on your Beacon has been updated to the latest version.
V
App Version
10.
App Store Version
7.
Branch
2
Enhancement
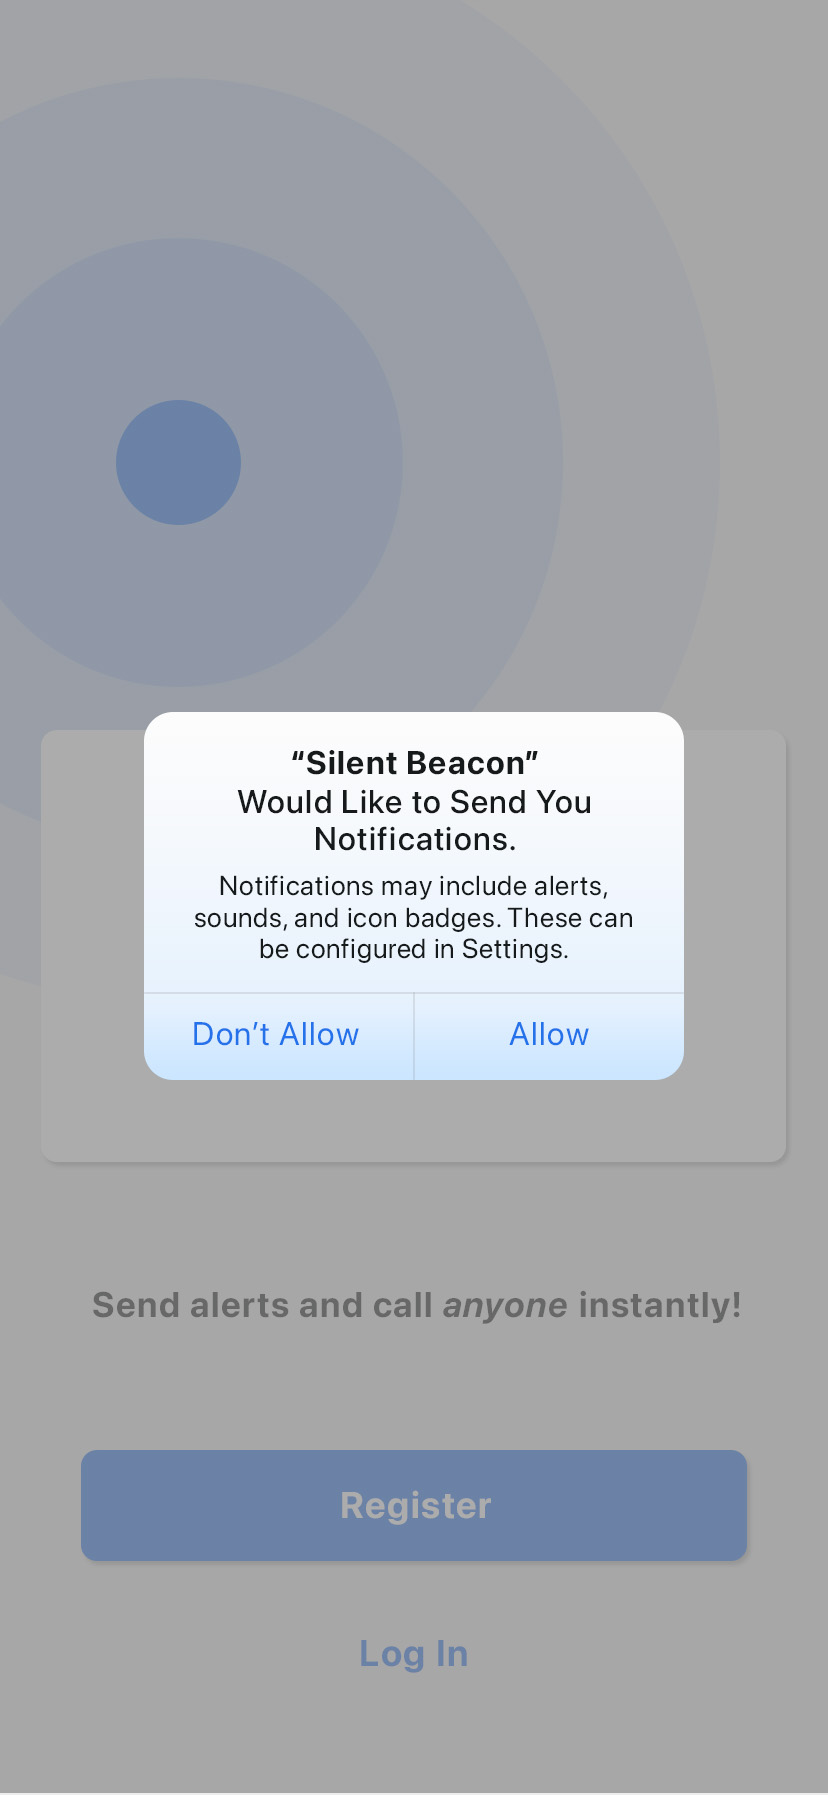
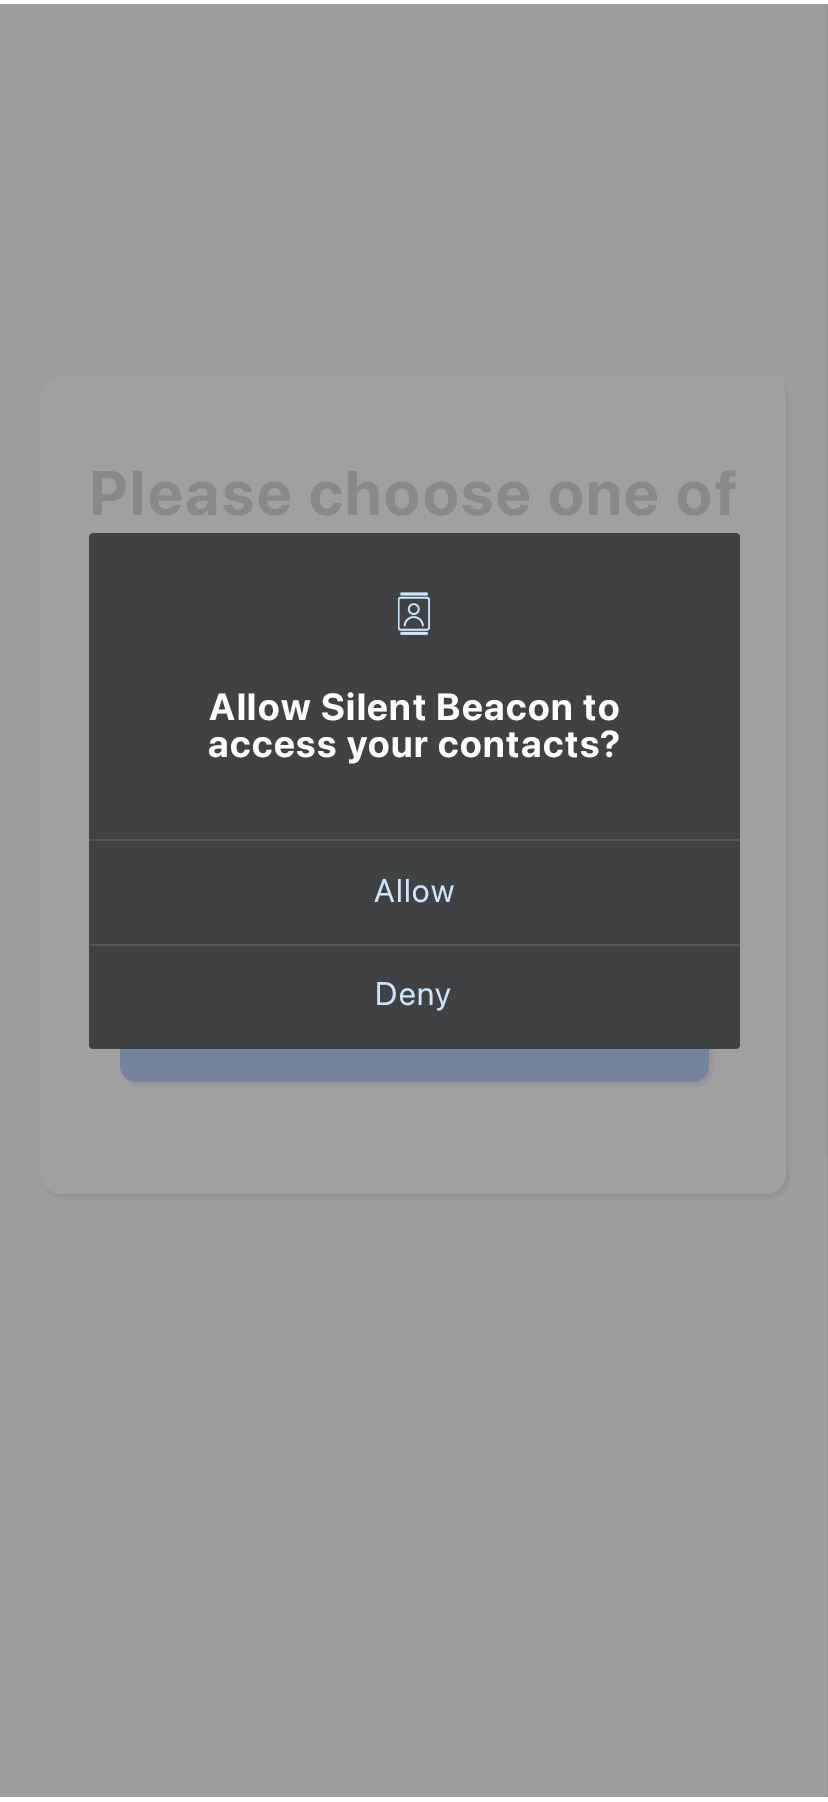
A prompt will appear asking you to turn on “Push Notifications”. This enables the App to send notifications when the the following events occur.
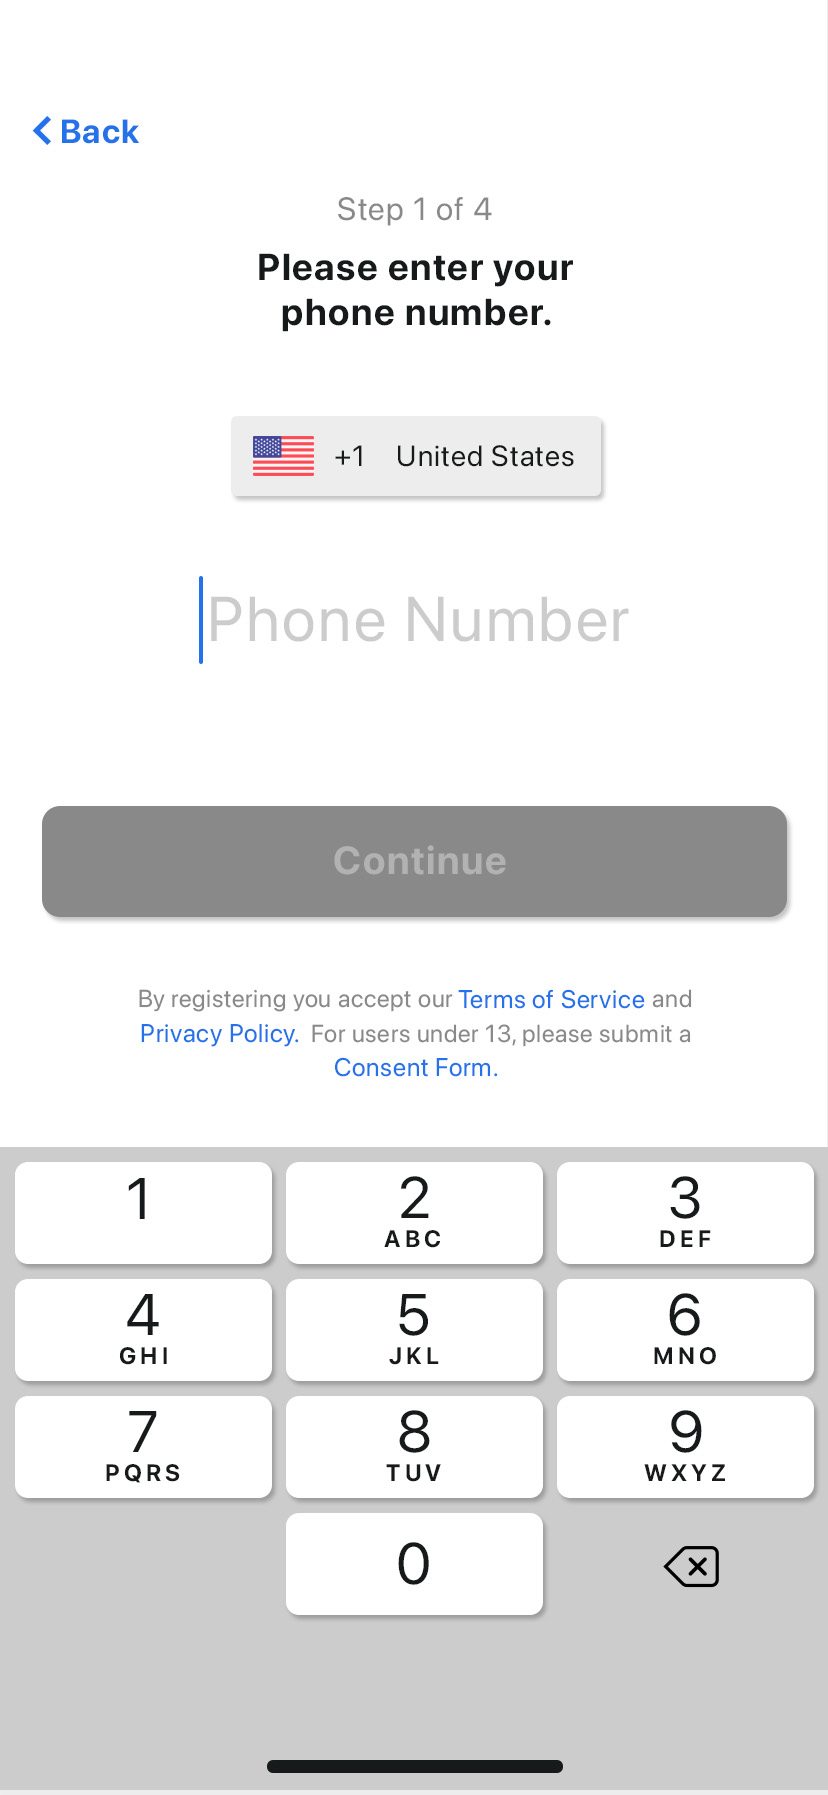
By registering, you accept our Terms of Service and Privacy Policy. For users under 13, please submit a Consent Form.
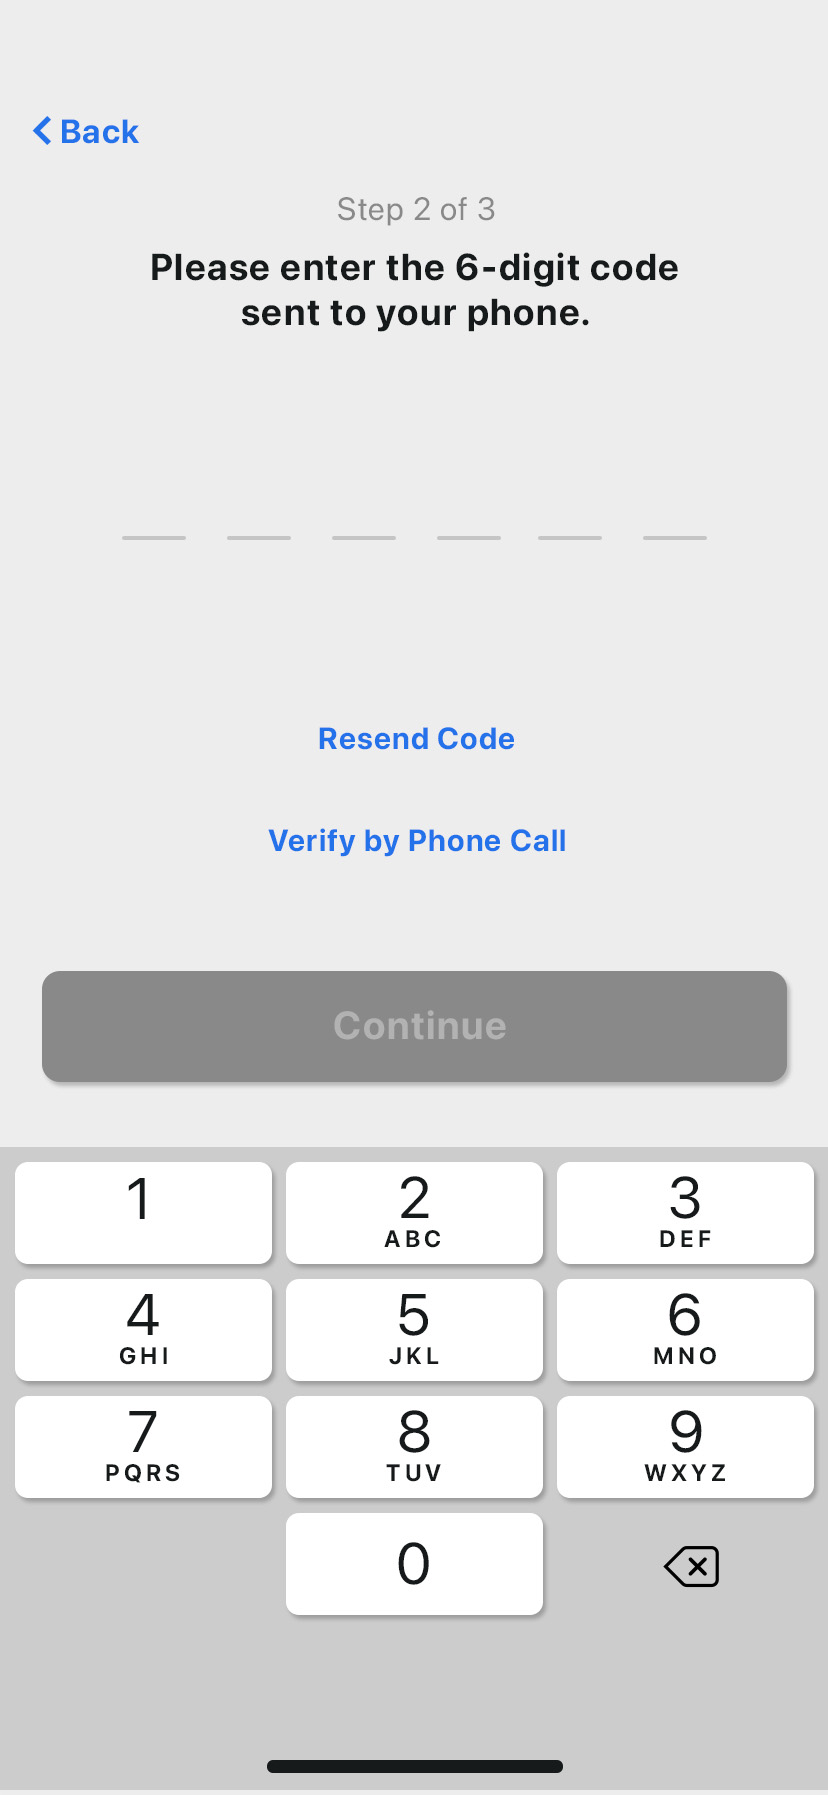
A verification screen requires you to enter a 6-digit code which is sent to the number they entered in the Step 1 screen.
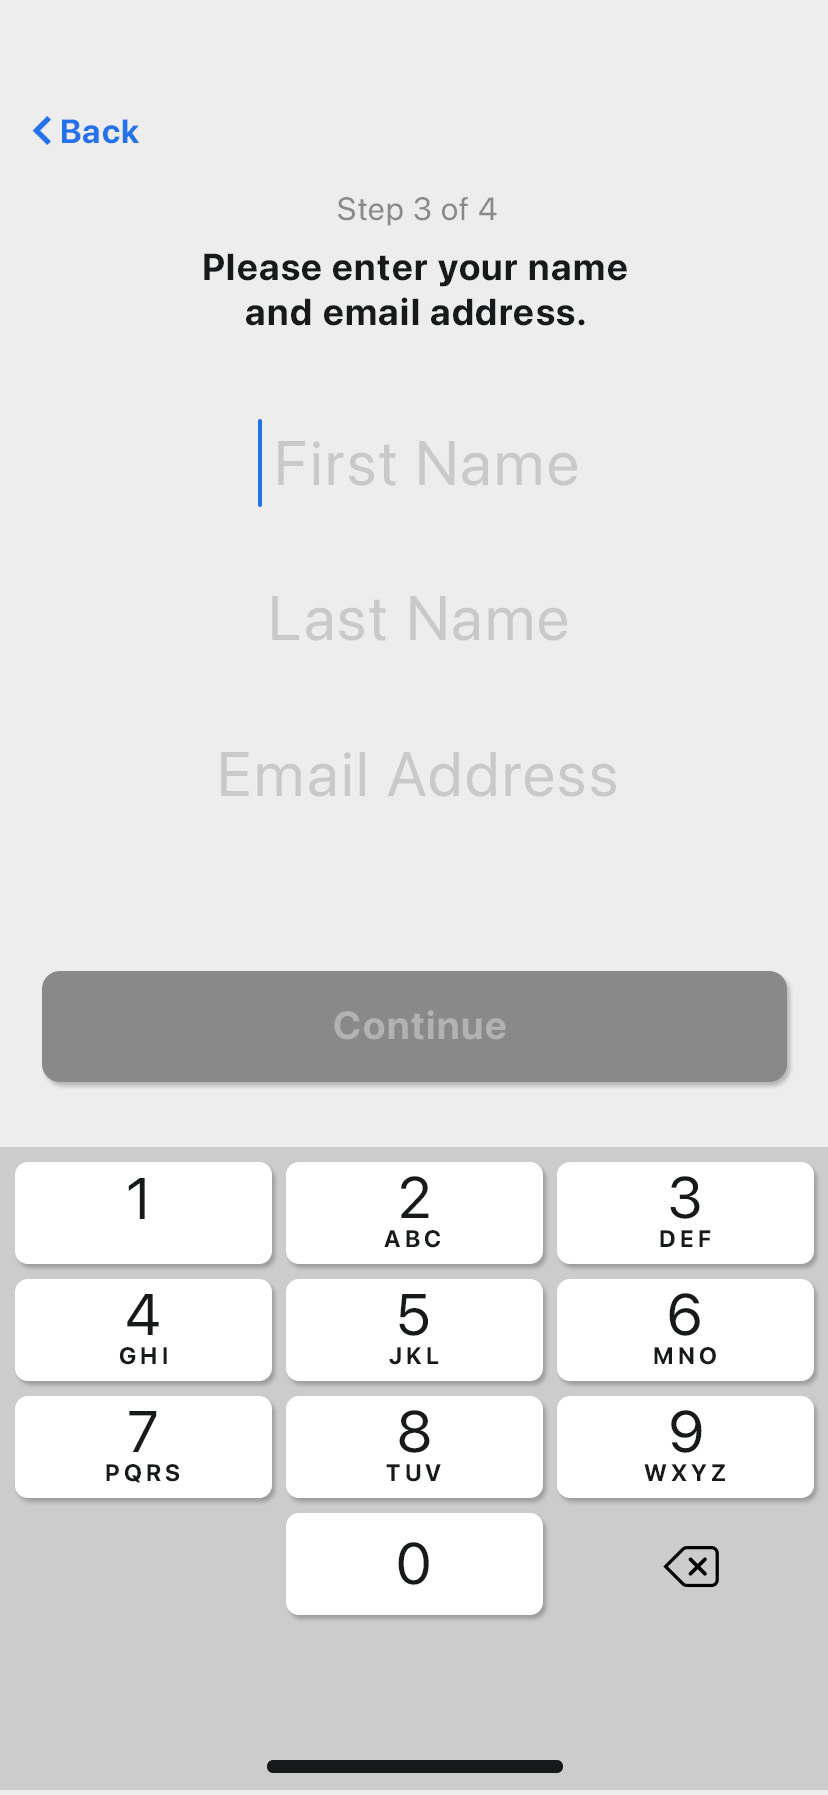
You are required to add your contact information so the system can correctly identify them when the App sends alerts to their Emergency Contacts.
The Email address is used in case you are locked out of your account or need assistance with troubleshooting.
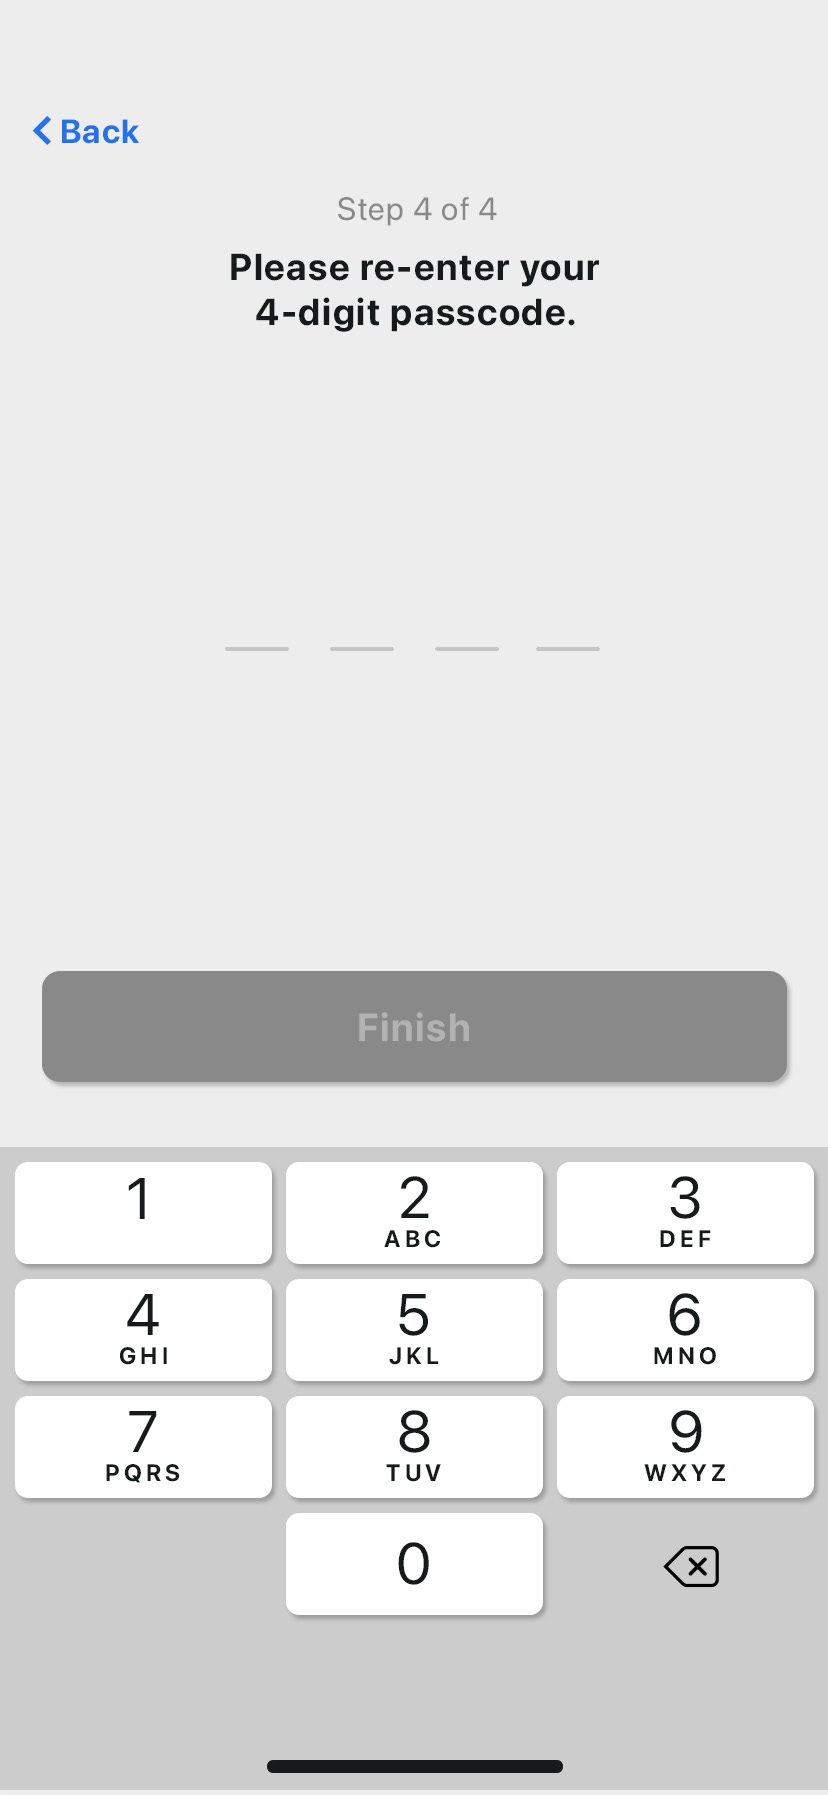
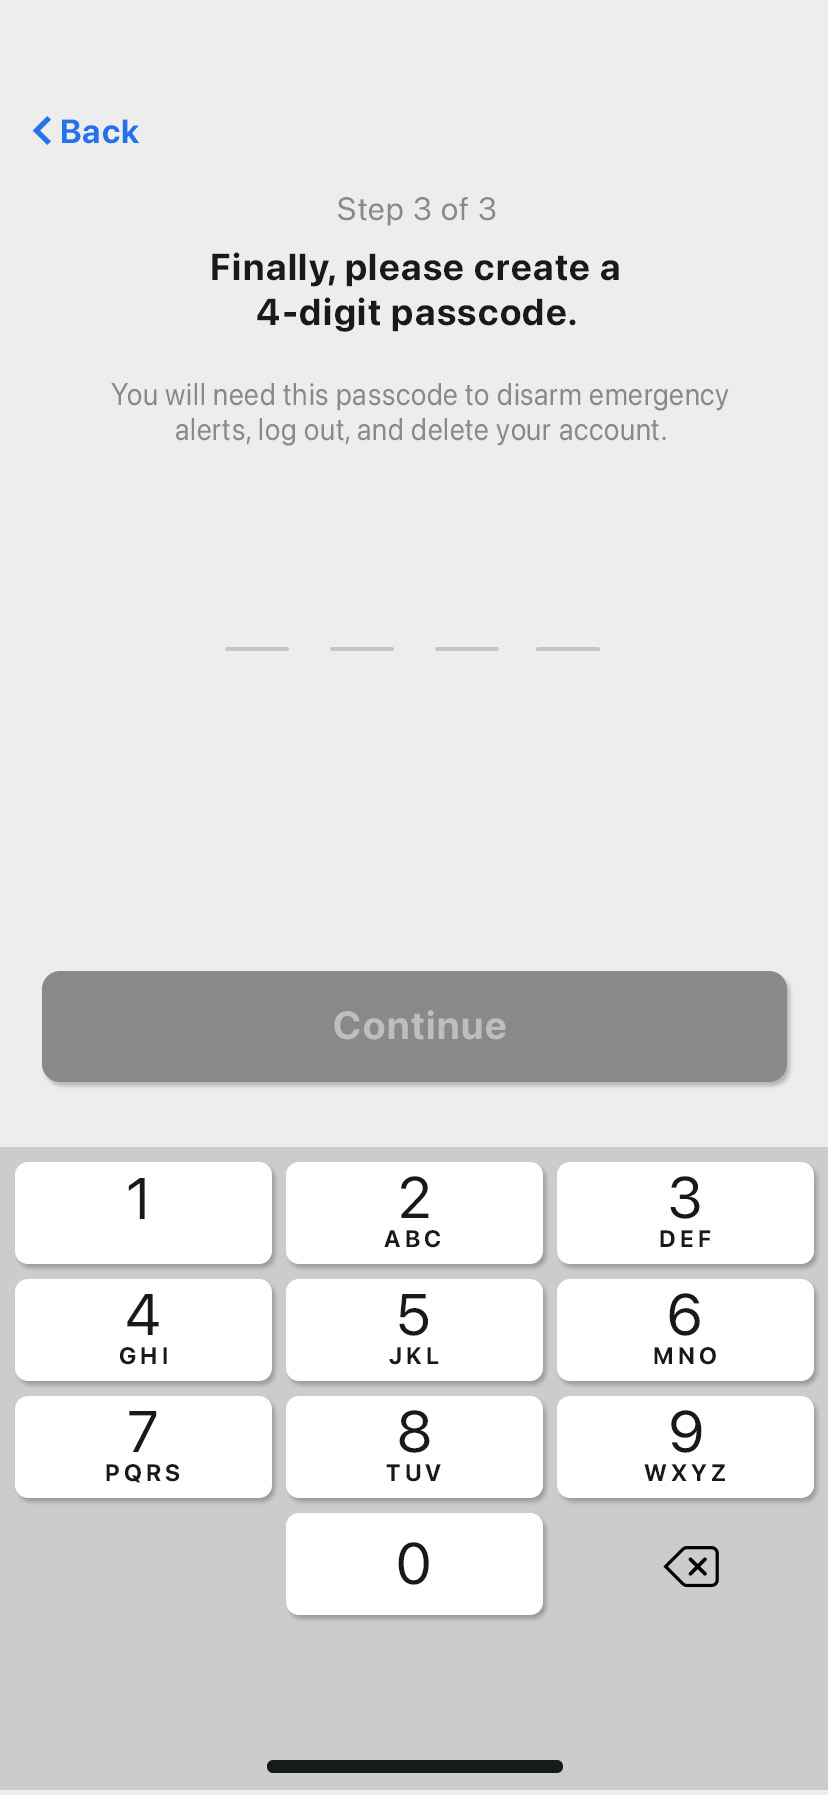
The final registration step requires you to enter a private 4-digit passcode. This code is used when you attempt to turn off an emergency alert mode or remove/delete the Application from your phone.
The you is prompted to re-enter the passcode to ensure the correct 4-digit passcode has been entered by you.
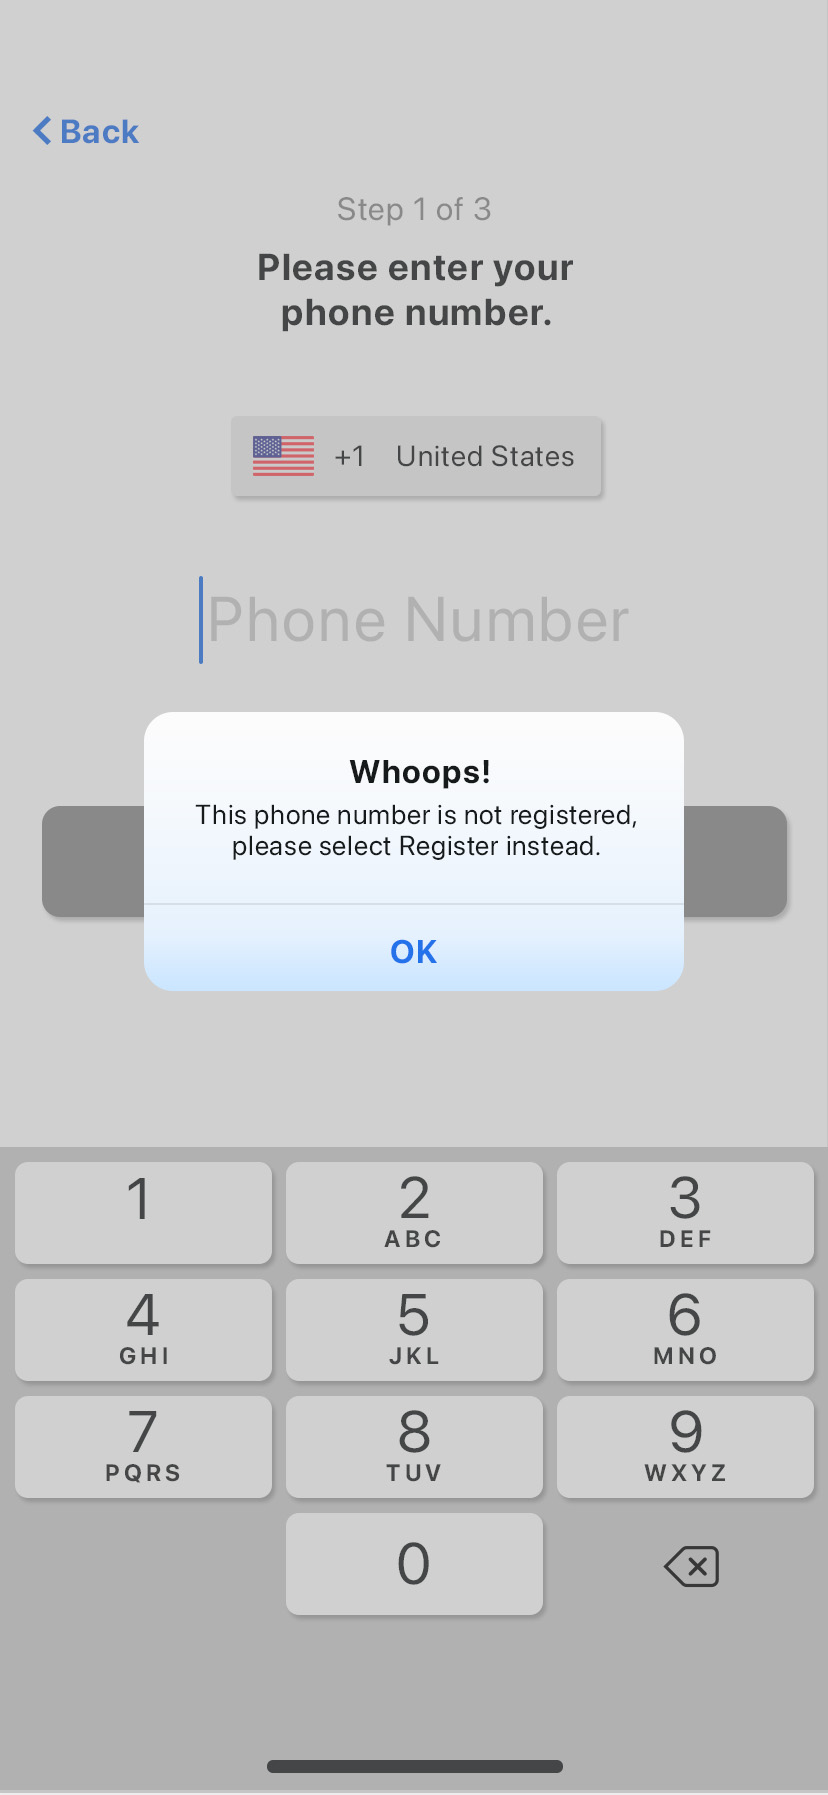
If you entered a phone number that is not registered, you will be notified with a popup message.
If you have not registered or had a previous account under this phone number please contact support.
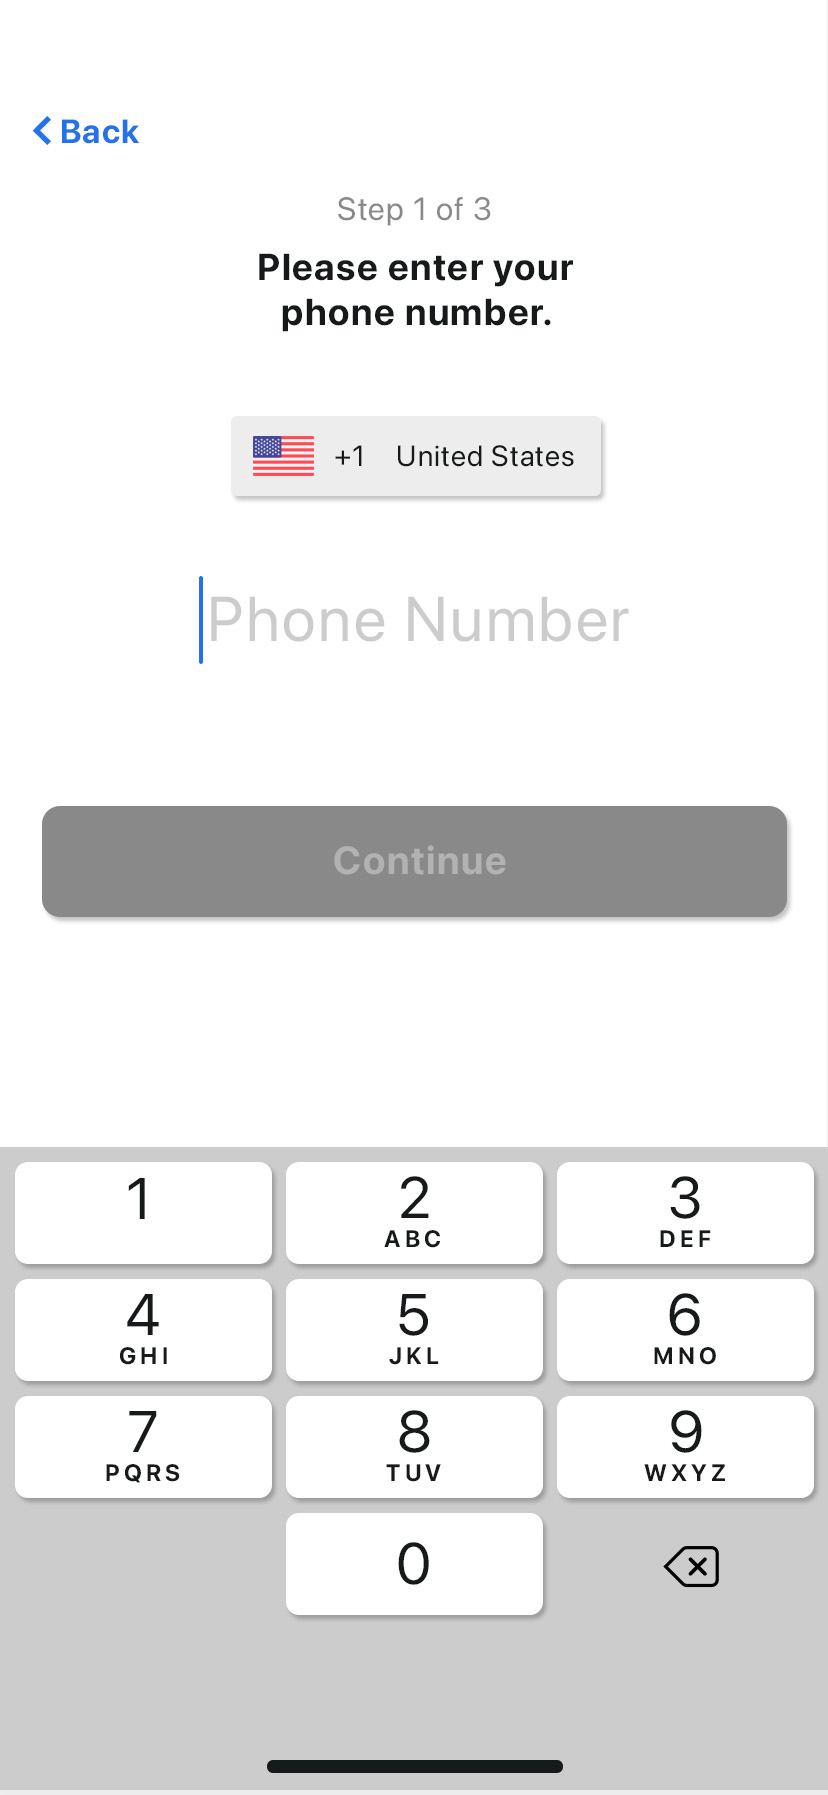
You ae required to enter the phone number of the smartphone that has been used to be setup with the App.
The final registration step requires you to enter a private 4-digit passcode. This code is used when you attempt to turn off an emergency alert mode or remove/delete the Application from your phone.
You are prompted to re-enter the passcode to ensure the correct 4-digit passcode has been entered by you.
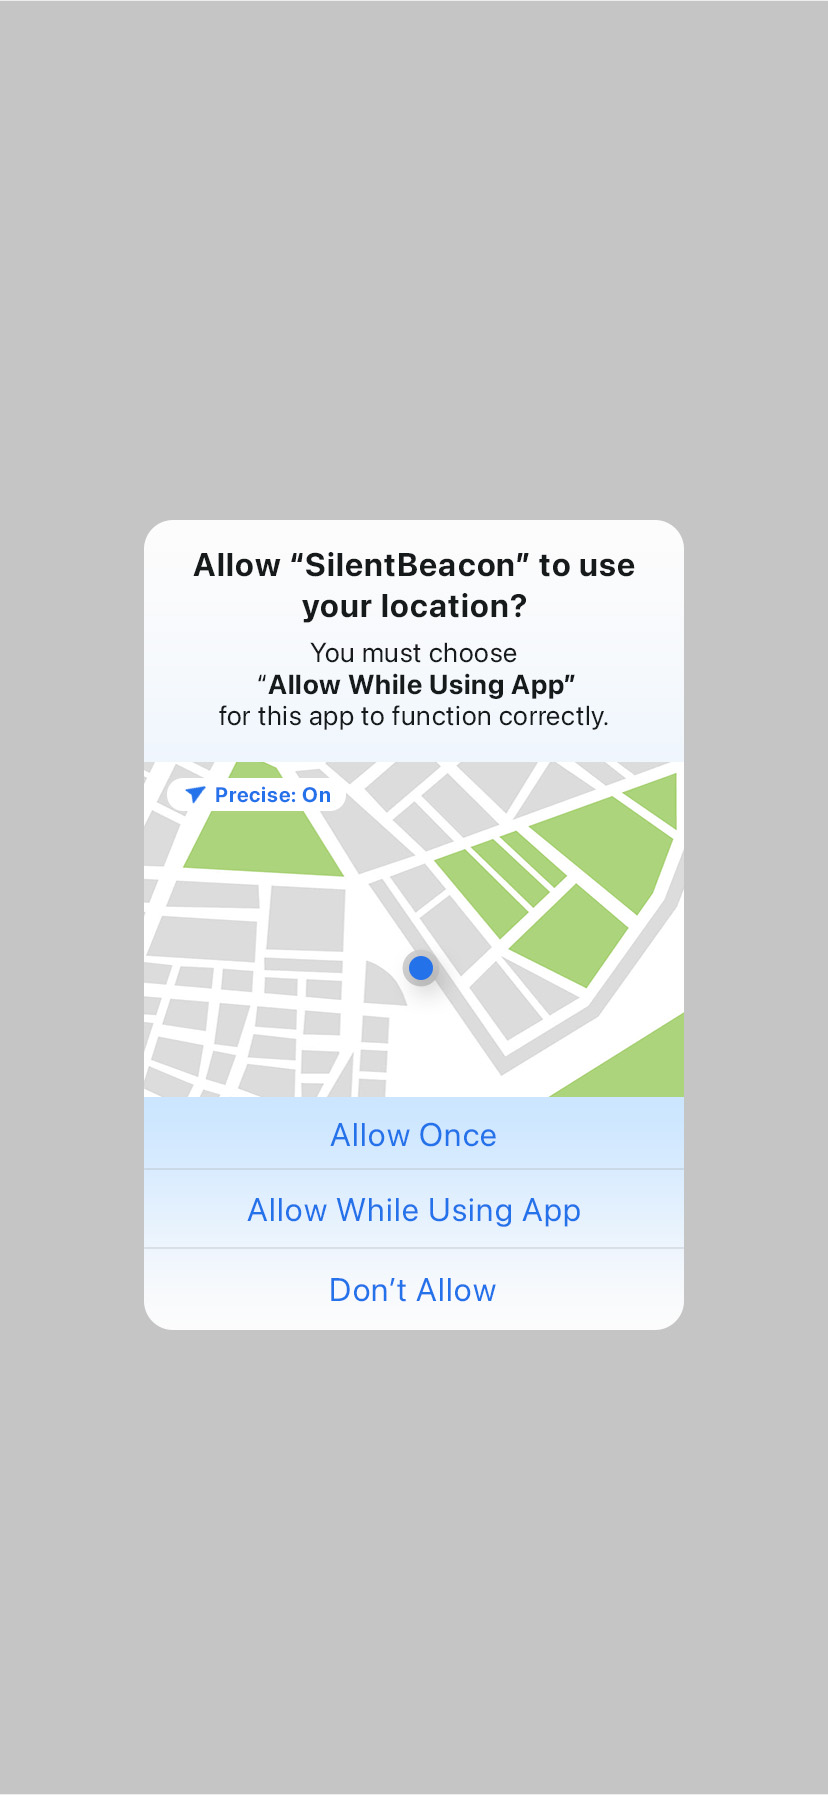
The screen on the left allows you to acknowledge the importance of enabling Location Services and displays the recommended option that will allow the App to properly function.
The screen on the right prompts you to select which location sharing setting.
IMPORTANT !
The App and Beacon will not function properly unless you select “While Using App” or similar functionality.
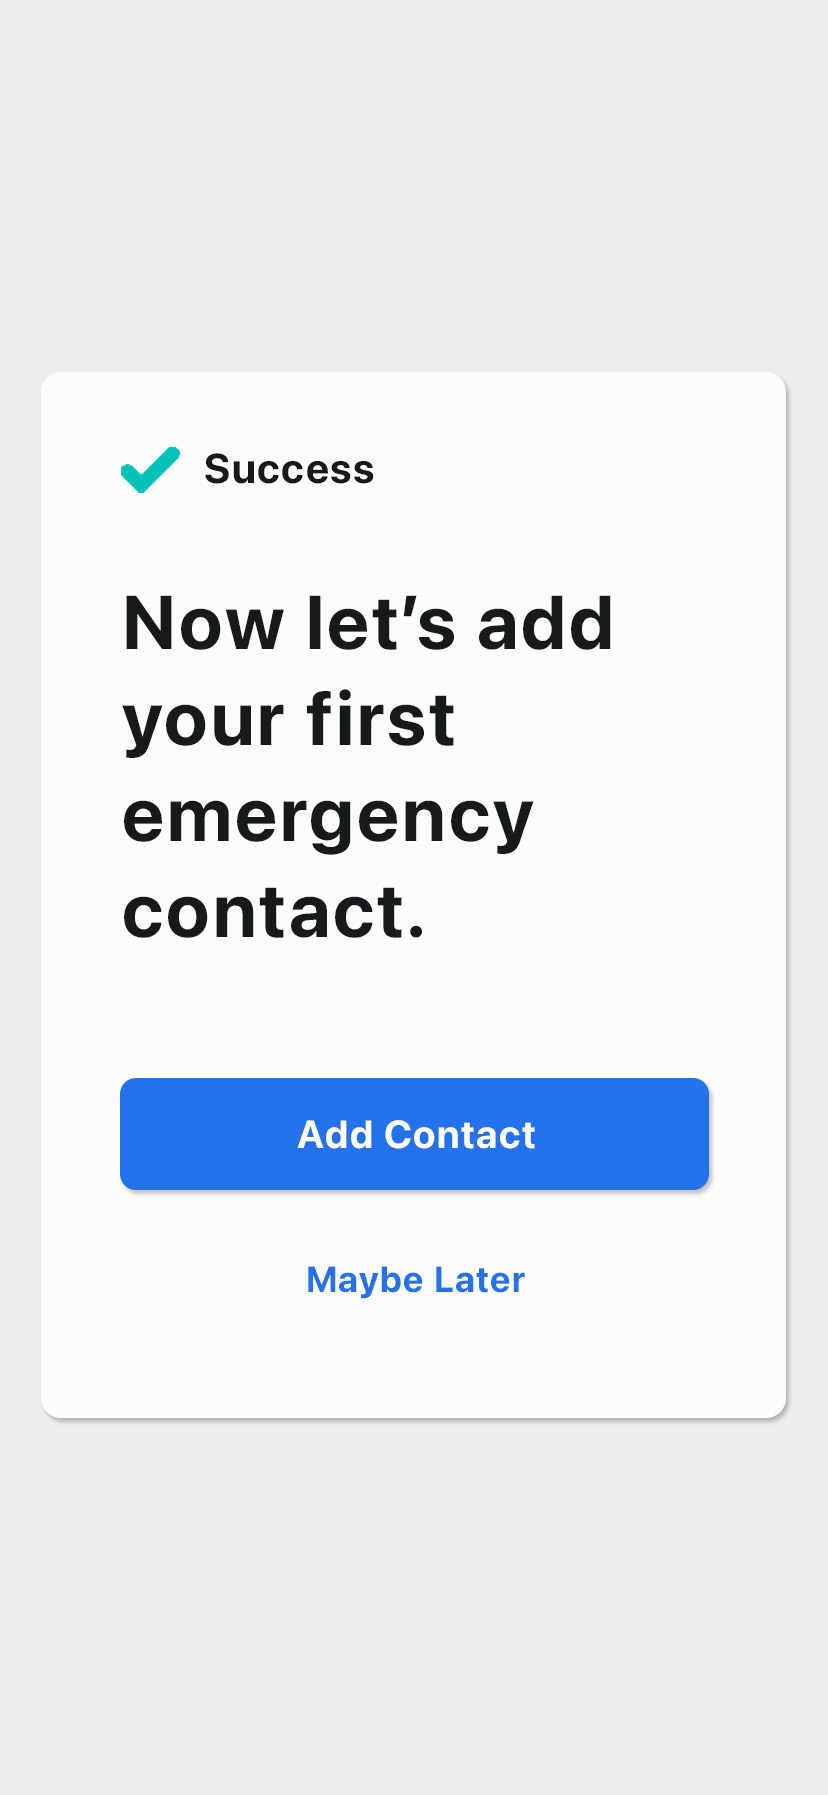
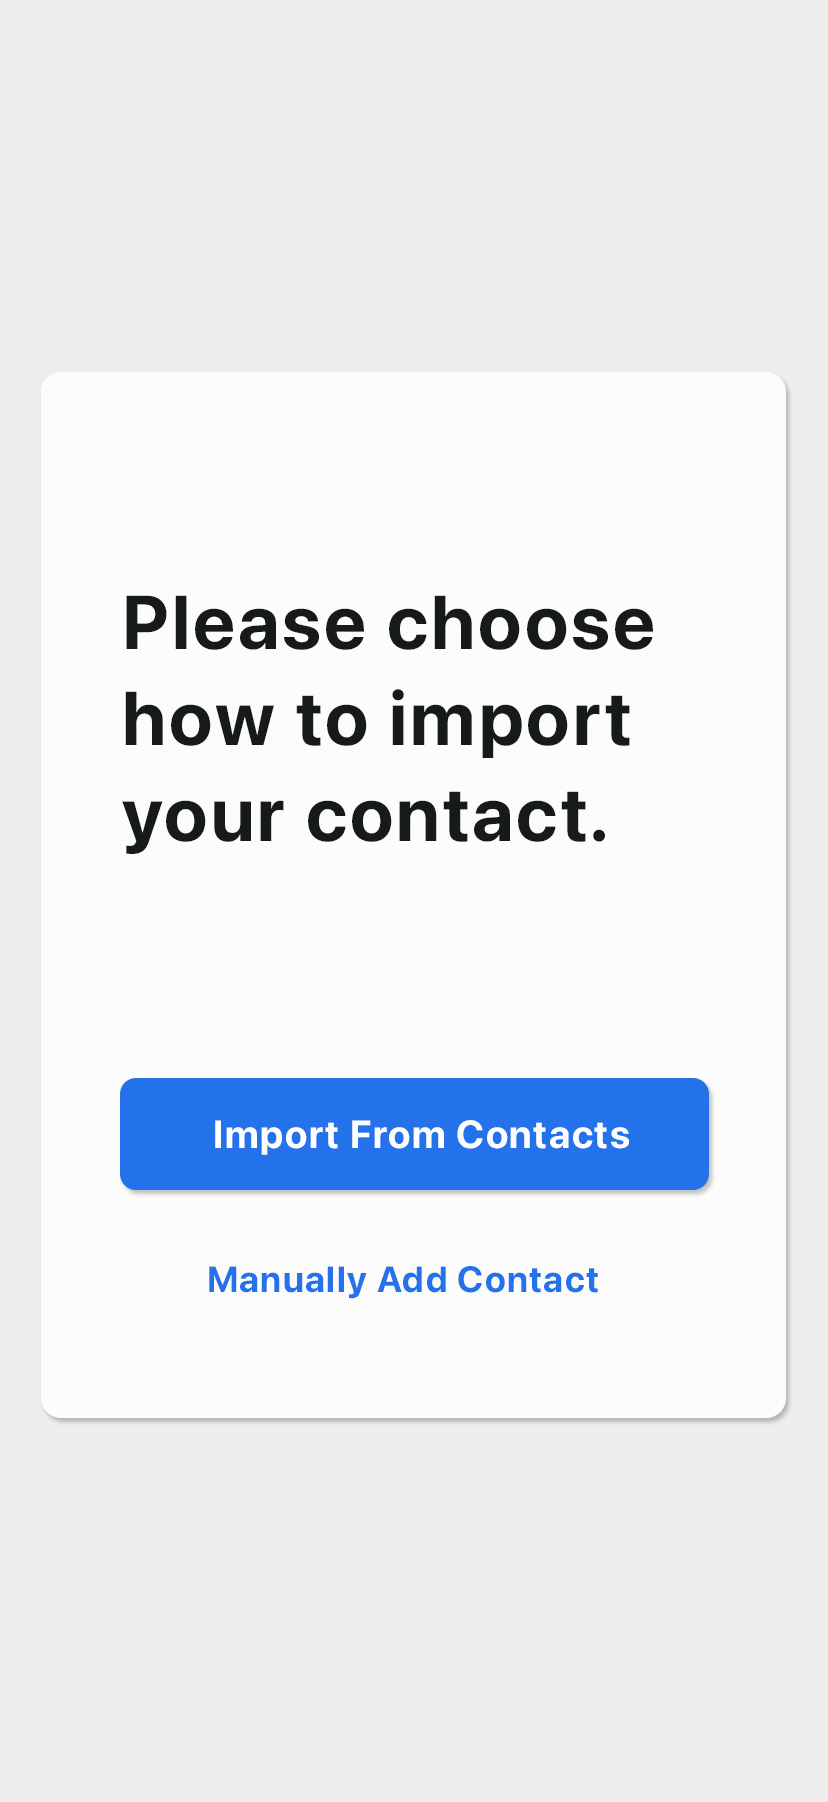
Once the registration is complete, you may choose to add their first emergency contact. You may skip this step by pressing “Maybe Later” and directly proceed to the Beacon setup page.
First Name/Last Name
The Contact’s name helps you distinguish which contacts receive certain alert notifications. Those Contacts can also be identified when they send alerts to the you.
Phone Number
The Contact’s phone number is needed so you can send alert text messages, push notifications, and/or call the contact when in an emergency.
Email Address (Optional)
The Contact’s email address is needed if you decide to send email alert notifications to the Contact.
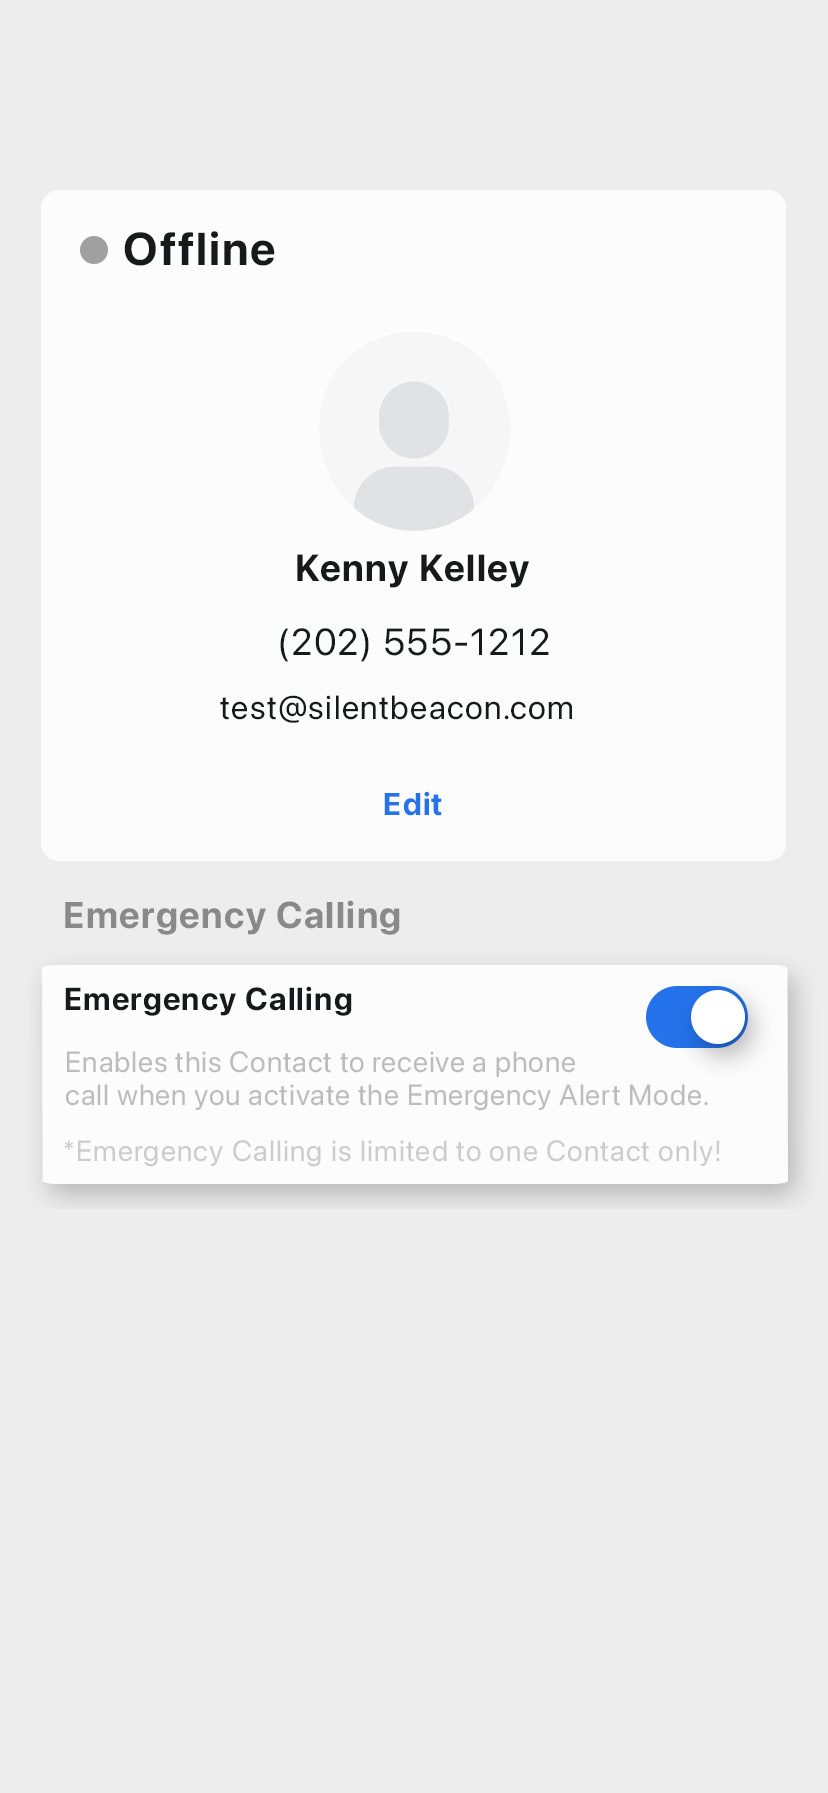
Contact Status
“Offline” – This Contact does not have their Silent Beacon App open. “Online” – This Contact has their Silent Beacon App open.
“In Emergency” – This Contact is currently in Emergency Alert Mode.
You may edit the Name and Email Address as well as the avatar, but the phone number cannot be changed at any time; this is used as the Contact’s unique identifier.
Emergency Calling
Enables this Contact to receive a phone call when you activate the Emergency Alert Mode.
IMPORTANT!
Emergency Calling is limited to one Contact only!
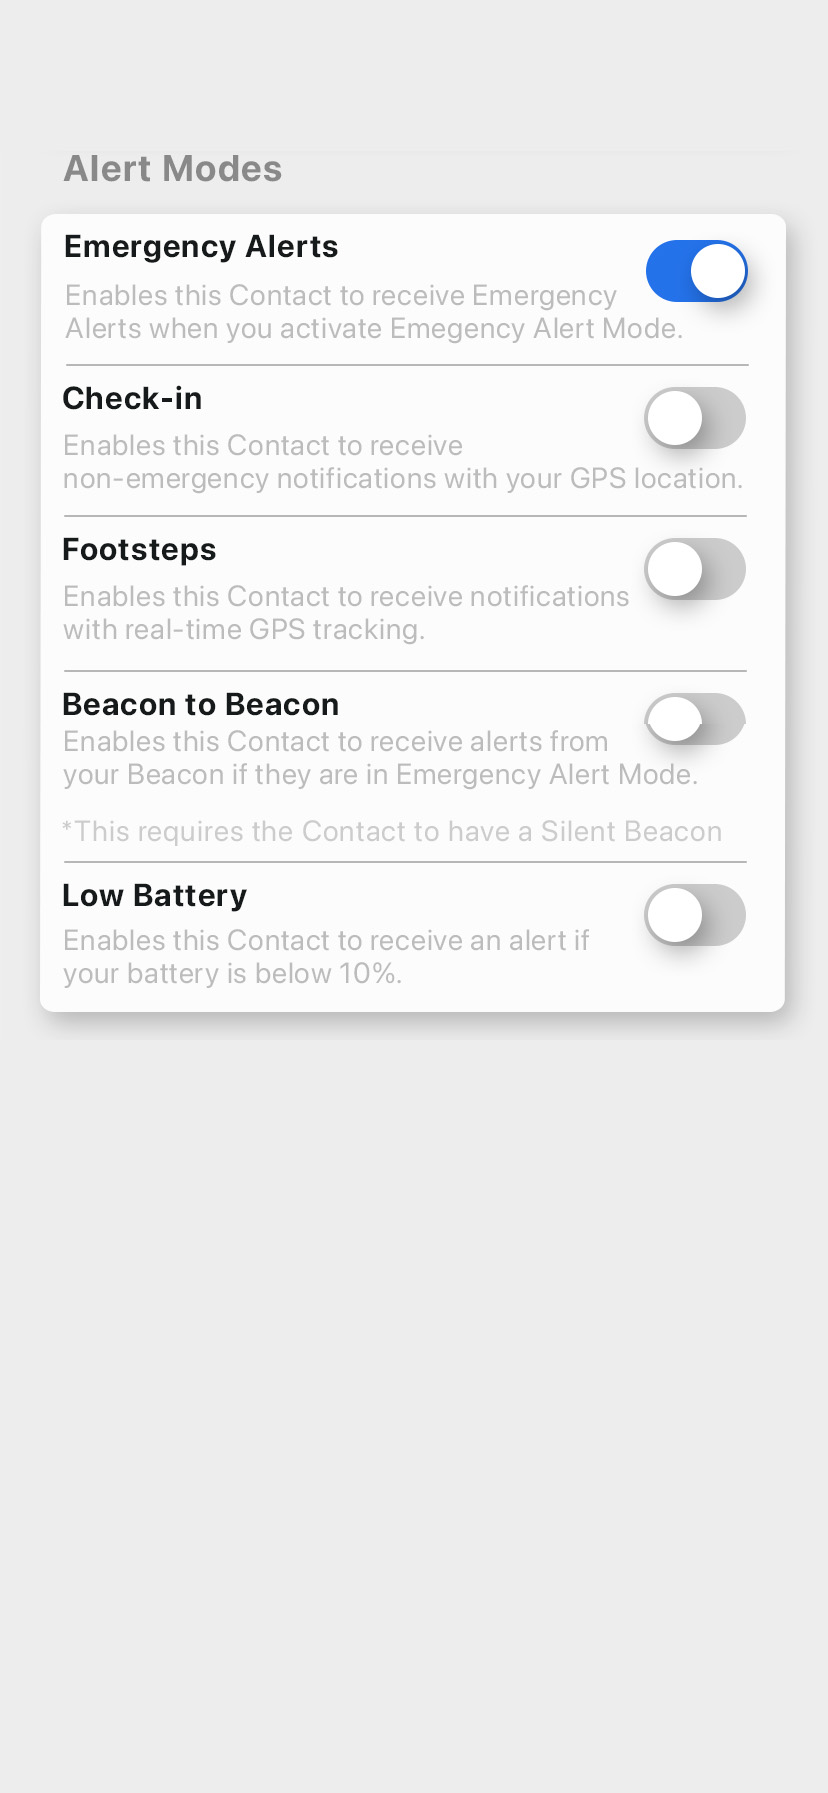
Emergency Alerts: Enables this Contact to receive Emergency Alerts when your alert the Emergency Alert Mode.
Check-in: Enables this Contact to receive non-emergency notifications with your GPS location.
Track Footsteps: Enables this Contact to receive notifications to track your live GPS location.
Beacon to Beacon: Enables this Contact to receive alerts from your Beacon if you are in Emergency Alert Mode. *This requires the Contact to have a Silent Beacon device.
Low Battery: Enables this Contact to receive an alert if your battery is below 10%.
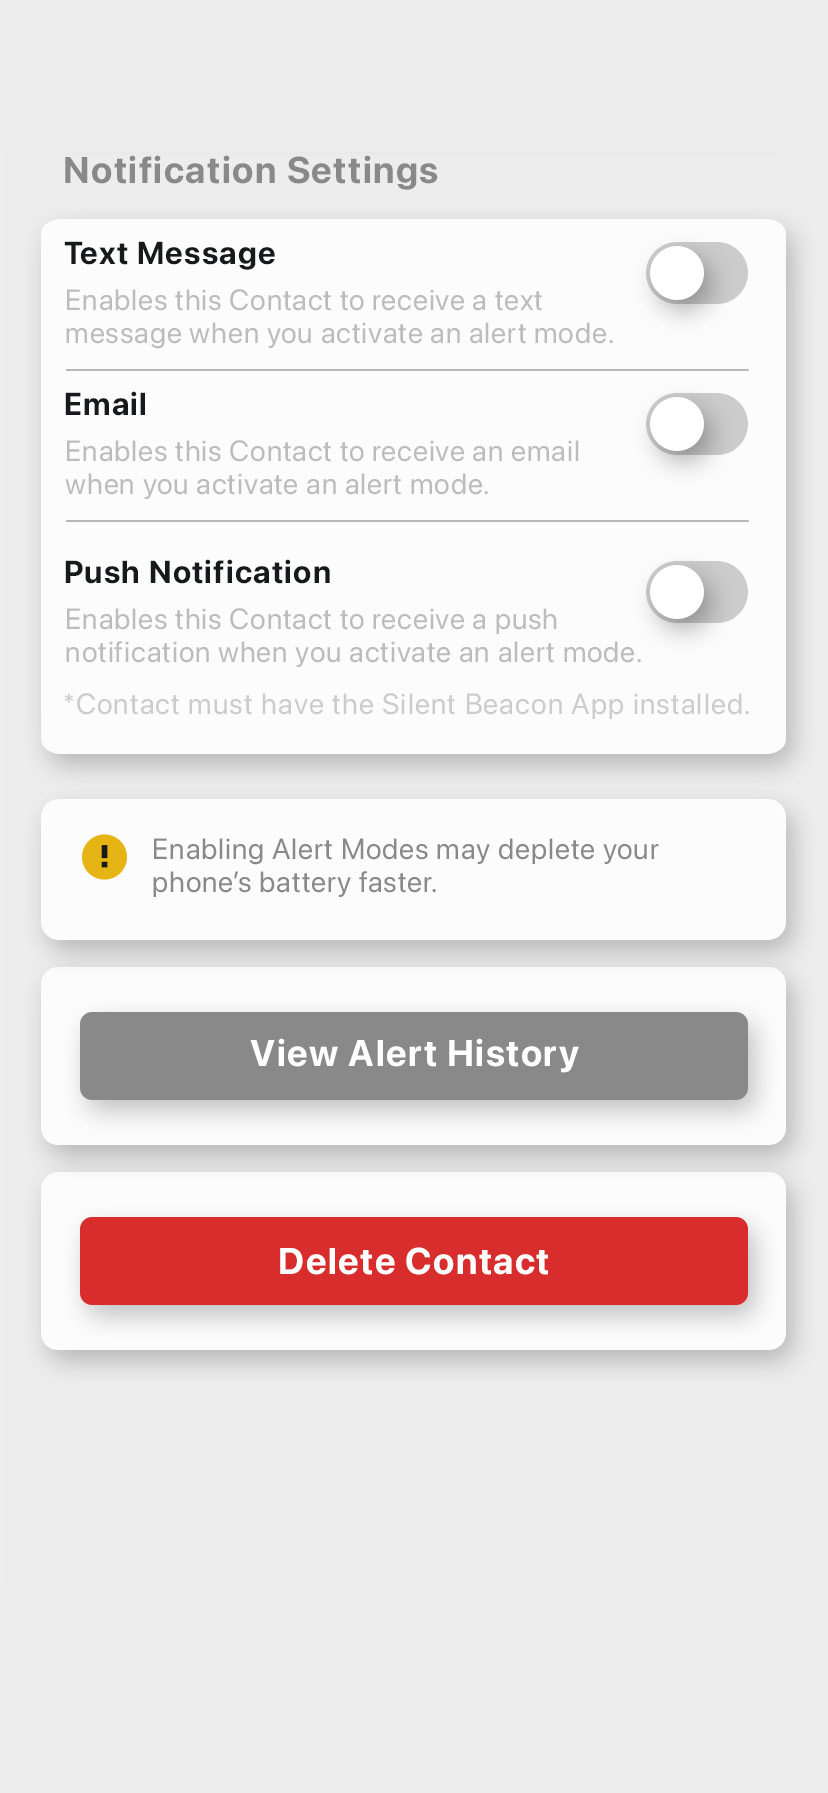
Text Message: Enables this Contact to receive a text when you activate an alert mode.
Email: Enables this Contact to receive an email when you activate an alert mode.
Push Notification: Enables this Contact to receive a push notification when you activate an alert mode. *This contact must also have the Silent Beacon App installed.
View Alert History: Shows past alerts and GPS locations of this Contact from the App.
Delete Contact: Will remove this Contact and their information from your account.
IMPORTANT!
Emergency Calling is limited to one Contact only!
Emergency Alerts: Enables this Contact to receive Emergency Alerts when you alert the Emergency Alert Mode.
Check-in: Enables this Contact to receive non-emergency notifications with your GPS location.
Track Footsteps: Enables this Contact to receive notifications to track your live GPS location.
Beacon to Beacon: Enables this Contact to receive alerts from your Beacon if you are in Emergency Alert Mode. *This requires the Contact to have a Silent Beacon device.
Low Battery: Enables this Contact to receive an alert if your battery is below 10%.
This connection can be skipped and found on the Beacon screen; however, we recommend connecting your Beacon at this point in the set-up process.
A prompt will appear asking if you would like to use Bluetooth.
Pressing “OK” will allow you to connect the Device to the App through Bluetooth LE connection.
IMPORTANT!
If “Don’t Allow” is pressed, the Beacon will not connect, and the App will not function properly.
In the Main Menu an (!) icon will appear at at the top right of the menu, prompting you to turn on Bluetooth.
The step-by-step setup guide will allow you to quickly connect your Beacon to the Application.
• Select Beacon model
• Charge Beacon
• Turn on Beacon
• Connect Beacon
IMPORTANT!
Bluetooth must be turned on your smartphone that is connecting to the App!
Ensure the Beacon is fully charged before connecting it to the App.
The accompanying USB-C cord packaged with the Beacon can be plugged into any USB-C port that can be found in a computer, wall outlet, or car.
To turn on the Silent Beacon, press the smaller button (smooth surface, not raised) for about 2 seconds. You will hear it power up and the LED light will activate cycling red-green-blue.
To see if the Beacon is turned on, press the same button and the LED should blink red or blue (red for not connected to the app, blue for connected).
Note:
To turn off the Beacon, hold both buttons for 5 seconds and it will start glowing Purple.
IMPORTANT!
Do not hold both buttons longer than 10 seconds as it activate Reset mode.
To pair the Beacon with the App, place the Silent Beacon next to the phone and tap “Connect”.
Please allow up to 30 seconds for the connection to work.
The App will now find the closest Silent Beacon and attempt to pair to it.
To see if the Beacon is turned on, press the same button and the LED should blink red or blue (red for not connected to the app, blue for connected).
IMPORTANT!
After initial Bluetooth connection, Bluetooth Calling will need to be connected.
Once the Beacon is paired to Bluetooth, “Beacon Calling” attempts to connect.
Beacon Calling enables the Beacon to call when in Emergency Mode. Once emergency mode is activated on the Beacon, the paired phone will automatically dial the preset number.
Note:
The Beacon has two-way communication via the water-resistant speaker and microphone. Once Beacon Calling is connected, you can place calls directly through the Beacon with only one press of a button.
Once the Beacon is paired to Bluetooth, a popup screen appears stating “Silent Beacon 2 would like to pair with your phone.”
Click “Pair” to fully connect the Silent Beacon to the Application.
Now that the Beacon is paired, “Bluetooth” and “Beacon Calling” show as “Paired” in blue and the Beacon’s current Battery level appears.
On this page, your can access helpful resources such as:
Beacon Device Manual
Reviews all features, capabilities, and set up process, as well as Alert Modes and notification options of the Silent Beacon Device.
Application User Guide
That is this guide being read now.
How-to Videos
YouTube videos on step-by-step setup and navigation.
Can’t Find Your Beacon?
You can Ping their Beacon to sound its chime. You must be within Bluetooth range for this to work
Device Information
You can view their current Firmware version and access Firmware updates.
Device Identifier
The support team can refer to this number if you have a technical issues.
Remove Beacon
The Beacon will unpair from your phone and delete your settings from the Beacon, allowing it to become accessible to other users.
Factory Reset
The Beacon will unpair from your phone and delete your settings from the Beacon, allowing it to become accessible to other users.
When the “Bluetooth” is Paired, but the “Beacon Calling” is not paired, press “Learn More” under “Need Help Pairing?” to troubleshoot the App/Beacon.
Once you press “Learn More” it will open the “How-To Information” section.
If the App has lost connection to the Beacon, it will continue to attempt to reconnect.
Once it finds your Beacon it will reconnect both Bluetooth and Bluetooth Calling.
“Remove Beacon” will delete the Beacon settings from the App. This is done when you no longer wants to use the App on their phone or tries reconnecting the Beacon.
Once you press “Learn More” it will open the “How-To Information” section.
Factory Reset allows you to reset the Beacon to its factory settings. All stored data and connection to the App will be erased. You may wish to Factory Reset the Beacon if there are issues with connection between the App and Beacon or if you are removing the Beacon from the Smartphone.
To complete this process you must go to their Bluetooth settings and delete the connection to Silent Beacon 2.0.
This website uses cookies so that we can provide you with the best user experience possible. For more information on how we handle cookies, please view our Privacy Policy.
Strictly Necessary Cookie should be enabled at all times so that we can save your preferences for cookie settings.
If you disable this cookie, we will not be able to save your preferences. This means that every time you visit this website you will need to enable or disable cookies again.
This website uses Google Analytics to collect anonymous information such as the number of visitors to the site, and the most popular pages.
Keeping this cookie enabled helps us to improve our website.
Please enable Strictly Necessary Cookies first so that we can save your preferences!